
Loading BAM alignment files | Private annotations


|
Table of Contents
: Data visualization
: Loading BAM alignment files | Private annotations |

|
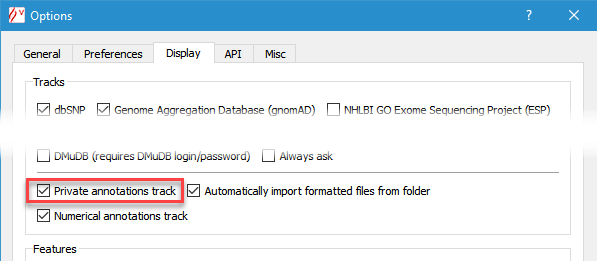
Private annotations functionality enables the user to define manually and import automatically sequence based annotations, such as PCR primers, probes, bibliography or memos. This feature is available on a dedicated track. Imported files can be displayed in full and squish modes (see below). To switch this feature on, check Display private annotations track in the Options dialog box (menu 'Tools' > 'Options' > 'Display' tab).
It introduced also external and custom annotations (see below).
As for variants, the basic annotation database functionality implementation relies on files stored either on each user's computer, or on a shared file system.
Private annotations are stored in local files, inside a folder that can be specified
in the Options dialog box (menu 'Tools' > 'Options' > 'Preferences' tab).
By default, this folder is 'Alamut VisualFiles' (inside 'My Documents' on Windows XP or Windows 7,
inside 'Documents' on Windows Vista, and inside the user's home folder on Mac and Linux):

Alamut® Visual creates individual annotation files per gene, named after the gene's official symbol
and with extension 'apa' (e.g. MLH1.apa for MLH1 annotations and DMD.apa for
DMD annotations; apa stands for Alamut Private Annotations).
![]() As for variants, it is also possible to define a set of different folders for annotation files (menu 'Folders' > 'Annotations').
As for variants, it is also possible to define a set of different folders for annotation files (menu 'Folders' > 'Annotations').
These folders can be used for different use cases or projects and the menu enables to easily switch from one folder to another:

When switching to another folder, the only visible annotations are those which are stored in a file within the selected folder, if any.
The first listed folder shortcut in the menu is always the one that has been defined
in the Options dialog box (see above).
Extra folder shortcuts can be added or removed from the menu.
![]() As for any important computer data, please backup annotation files regularly.
As for any important computer data, please backup annotation files regularly.
![]() When annotations are stored in a shared file system, caution must be taken so that 2 people don't edit concurrently annotations of the same gene.
When annotations are stored in a shared file system, caution must be taken so that 2 people don't edit concurrently annotations of the same gene.
Annotation files use a simple XML representation format, suitable for processing by other applications.
Private annotations are organized in sub-tracks called datasets.
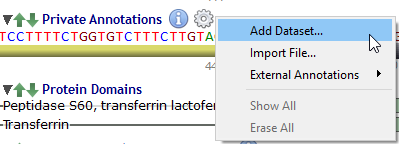
Datasets are managed through a menu (by clicking on the 'gear' icon) close to the 'Private Annotations' label:
 |
 |
 |
 |
 |
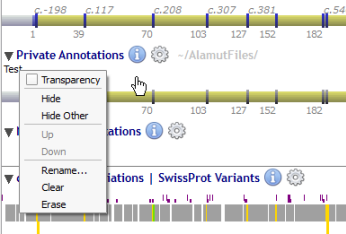
Once created, each dataset is managed through the context menu (by right-clicking) of its own label:
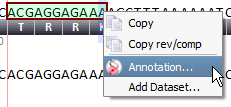
Create annotations from a nucleotide selection in the private annotations track and its associated context menu (by right-clicking inside the selection).
Private annotations are defined by a set of properties accessible in a dedicated editor:
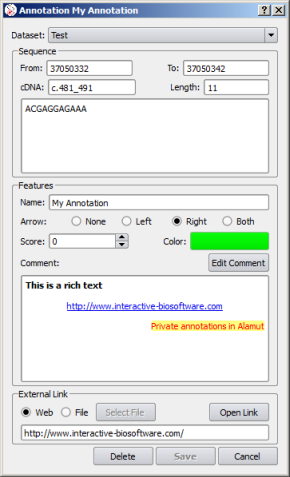 |
Edit Comment |
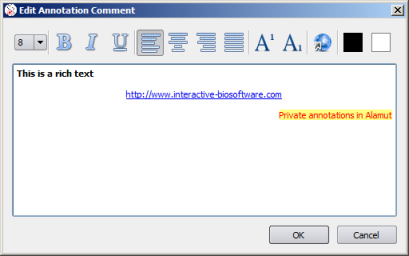 |
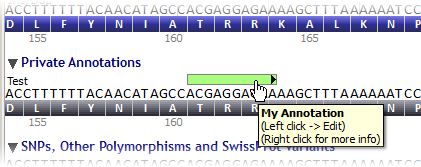
Once the annotation is saved, it is visible in its track and dataset:
![]() Moving an annotation to another dataset (using the Dataset combo box)
or to another genomic position (using From and To entry fields)
is enabled in the annotation properties editor.
Moving an annotation to another dataset (using the Dataset combo box)
or to another genomic position (using From and To entry fields)
is enabled in the annotation properties editor.
Alamut® Visual supports the import of annotations in the BED and the BED detail formats.
It also supports the GFF version 2, the GFF version 3
and the GVF formats.
This facility enables to import files, manually (through the context menu, by right-clicking) or automatically (by checking Automatically import formatted files from folder in the Options dialog box), and to display data accordingly in additionnal tracks.
 |
OR | 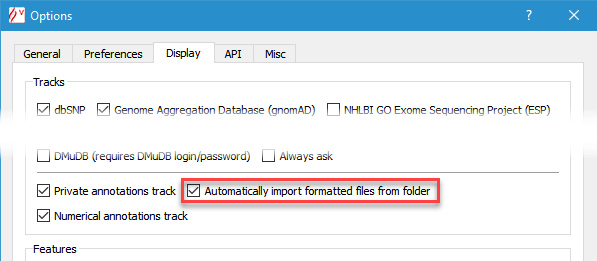 |
| OR | ||
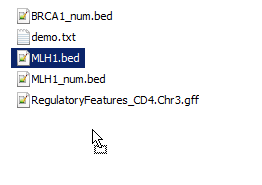 |
 Drag & Drop |
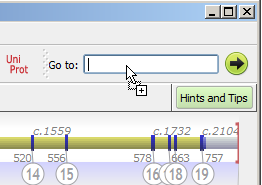 |
![]() Importing requires files with appropriate extension (
Importing requires files with appropriate extension (.bed, .gff, .gvf), to be placed in the appropriate folder.
![]() Data available through a URL may also be imported by creating a Windows-like
Data available through a URL may also be imported by creating a Windows-like .url file. By default, data are supposed to be in the BED format and a dedicated field Type may be used to specify the appropriate format, see example.
Once such a .url file is placed in a folder, Alamut® Visual behaves exactly as if the data were stored in a local file.
![]() BED files use 0-based coordinates: the first base of the chromosome is considered position 0.
BED files use 0-based coordinates: the first base of the chromosome is considered position 0.
Annotations are then displayed using the graphical features provided by these formats:
| Simple BED annotations |  | ||||
| Complete BED annotations |  | ||||
| Detail BED annotations |  | ||||
| GFF3/GVF annotations |
|
![]() Editing imported annotations is not possible.
Editing imported annotations is not possible.
Once imported, each dataset is managed through the context menu (by right-clicking) of its own label:
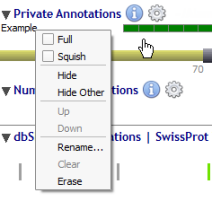
| Full mode |  | |
| Squish mode |  |
Alamut® Visual handles standard track lines within BED files: each track line defines a dataset which name is the description of the track line or its name if no description is provided.
Annotations following a track line are put in the named dataset. For instance: track name=test visibility=2 color=0,128,0 useScore=1 itemRgb=Off.
Track line variables taken into account are:
name: name of the trackdescription: description of the tracktype: none (standard) or "bedDetail" (URL link per item)color: items coloraltColor: items color when score is negativeuseScore: none or "1" (items color is on a grey scale)itemRgb: "off" or "on" (color given per item)url: URL used for "bedDetail" typevisibility: visibility mode on upload ("1" = dense, "2" or "3" = full, "4" = squish)Customization of GFF3/GVF annotations files display relies on Alamut® Visual directives that have to be added ahead of such files (after the initial ##gff-version line).
An Alamut® Visual directive is a single line starting with ##alamut: and followed by a set of conditions and instructions under the form feature=string separated by the ":" mark.
Several Alamut® Visual directives can be put in such files.
Admissible conditions are source=string and/or type=string, where string is to be replaced by any value taken by the source field (column 2) or the type field (column 3) in the imported file.
A directive with no condition applies anyway.
Admissible instructions are either dataset=string, name=string, color=string, arrow=string, note=string and/or extLink=string, where string is to be replaced by source or type or by any tag of the attributes field (column 9) of the imported file.
When a directive applies, any instruction feature will be set to a value according to the provided string:
- if the string is source or type, the feature will be set to the value of the source field or of the type field in the imported file.
- if the string is any tag of the attributes field in the imported file, the feature will be set to the value associated to the tag.
Detailed example:##gff-version 3When type is "gene", dataset is set to "gene", name is set to the value of the "gene_name" tag and color is set to magenta.When type is "transcript", dataset is set to "transcript", name is set to the value of the "transcript_name" tag and color is set to blue.In other cases, dataset is set to type and name is set to type.Other features are set to default as explained hereunder. |
![]() Default settings in directives:
Default settings in directives:
dataset is source. It can be set to type.name is Name. It can be set to any tag of the attributes field in the imported file.color is darkCyan. It can be set to a RGB string in decimal (R,G,B) or in hexa (#RGB).arrow is given by the strand field (column 7) of the imported file. It can be set to none, left, right or both.note (comment) is Note. It can be set to any tag of the attributes field in the imported file.extLink (external link) is automatically extracted from the attributes field when a value matches a web address. It can be set to any tag of the attributes field in the imported file.![]() The "
The ":" character used to separate conditions and instructions may be replaced by some other punctuation marks (e.g. "+", "|" or "~" but not "#", "=" , ";" or ","), in case the ":" mark would be used elsewhere.
![]() For each annotation, Alamut® Visual tries to apply sequentially directives of the file. The only first applicable directive is ever used.
For each annotation, Alamut® Visual tries to apply sequentially directives of the file. The only first applicable directive is ever used.
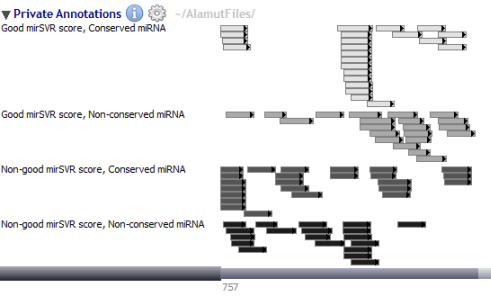
Alamut® Visual 2.3 introduced an external and custom annotation functionality. To access this feature, click on the information menu and select "External Annotations" in order to display a submenu of available external annotations. The last external annotation visible in the menu (here mirna2bed.py) stands for custom annotations, see below.

Current available external annotations:


Alamut® Visual handles also custom annotations which enables users to display their own annotations according to the gene/transcript that is currently displayed within Alamut® Visual. This functionality requires to be specified in the in the Options dialog box (menu 'Tools' > 'Options' > 'Misc' tab).
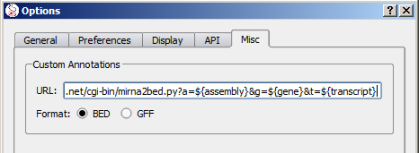
Custom annotations requires 2 informations to be operationnal:
${gene} HGNC gene symbol${geneId} HGNC Id${geneEnsemblId} Ensembl gene Id${chrom} gene chromosome${assembly} current assembly${start} genomic coordinates including flanking${end} genomic coordinates including flanking${strand} '+' or '-'${omimId} OMIM Id${transcript} Transcript RefSeq Id${transcriptEnsemblId} Ensembl transcript Id${protein} Protein RefSeq Id${uniprot} UniProt IdIn the example above in the Options dialog box snapshot, the CGI /cgi-bin/mirna2bed.py?a=${assembly}&g=${gene}&t=${transcript}
requires 3 parameters: a (assembly), g (gene symbol) and t (transcript).
As this CGI depends on transcript, Alamut® Visual will call it each time a new transcript is selected in Alamut® Visual.
Alamut® Visual also supports importing annotations as an histogram in a dedicated Numerical Annotations track.
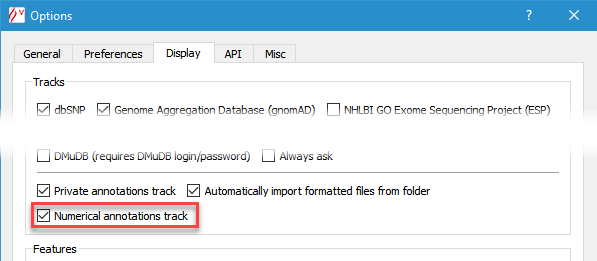
To switch this utility on, check Display numerical annotations track in the Options dialog box
(menu 'Tools' > 'Options' > 'Display' tab).
Numerical annotations are managed through the context menu (by right-clicking) of the 'Numerical Annotations' label:
Once the file is manually imported, the histogram represents the number of times each genomic position is included in an annotation within the file.
 |
 |
 |
![]() Importing BED files in the numerical track has to be done manually.
Importing BED files in the numerical track has to be done manually.
![]() Only a single BED file can be displayed in the numerical track at the same time.
Only a single BED file can be displayed in the numerical track at the same time.
When available, it is possible to display numerical annotations from both, forward or reverse strands.
| Both strands |  | |
| Forward strand |  | |
| Reverse strand |  |
© 2020 Interactive Biosoftware - Last modified: 30 December 2017